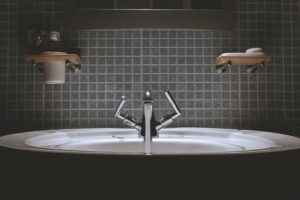
Over time, the caulk in your bathroom can begin to splinter and wither away. While it’s totally normal for caulk to wear away naturally, it can make your bathroom look worse for wear, even appearing dirtier than it really is. You can avoid having a bathroom that looks like it’s in disrepair by recaulking, but it’s important to fully remove existing caulk before reapplying. This will ensure that your bathroom looks fresh and new, without the dirty or splintered remains of old caulk getting in your way. To ensure a great looking freshly caulked bathroom, be sure to follow this process for removing bathroom caulk.
Soften
To ensure a clean removal, it’s important to first soften the existing caulk. This will prevent a messy and difficult removal, and also help you easily remove more stubborn bits of old caulk. Properly softening involves applying calk remover and waiting a minimum of 2 hours before removal. Ideally, you’ll want to let the caulk remover sit for about 24 hours before removing the old material.
Remove
Once the caulk remover has had time to work its magic, you can remove the old, degraded caulk. As long as it’s had enough time to sit with the remover, the caulk should easily come off in large, clean pieces. Use a caulk remover tool rather than a utility knife, since knives can cause damage to your bathtub if you’re not a caulking expert. You can find caulk remover tools at your local hardware store that will help you remove all the material without causing damage to your fixtures.
Clean Up
Whether your caulk was removed in large, clean pieces or was more stubborn, cleanup is an important step in caulk removal. There will usually be small pieces left between your plumbing fixtures and tile, along with stubborn residue. You can usually clean these out with a toothbrush to ensure a clean base for the new bathroom caulk.
Sterilize
Even if it was a simple removal, it’s incredibly important to sterilize the area before applying new caulk. On the newly cleaned surface, sterilize the surface thoroughly with alcohol. Once it has completely dried, wash the area with a bleach solution of one part bleach, three parts water. This will kill any mold and mildew that can cause problems with your bathroom caulk down the road. After this, you should be ready to freshen up your bathroom with an application of brand new caulk.
Get in Touch With B&D Today!
Dealing with any plumbing concerns that require a professional to step in? Struggling with an absolute plumbing emergency that can’t wait? Let B&D Plumbing know. B&D Plumbing Inc. services the greater Washington D.C. metropolitan area, including Maryland and Northern Virginia. Get in touch with us by calling (301) 595-1141 or follow us on social media including Facebook, Twitter, LinkedIn, and Pinterest. As a small, family-owned business, we understand how important your home is—and we offer exceptional service that matches!
